

Last Updated on December 13, 2022.
Wondering how to set up a shrimp tank from scratch? In this guide, we’ll take you through 7 easy steps on setting up your shrimp tank!
I’ve heard people say shrimp are the “bonsai” of the fish keeping world and in many ways, I’d definitely agree. However, if you set up the right environment for your shrimp, you shouldn’t have any more trouble keeping shrimp than regular tropical fish.
My uncle used to breed and sell koi, and he used to say “when you keep fish, you’re actually keeping water, and the fish just live in it”. The same thing definitely applies to your new little shrimp friends and living by this mantra continues to help me give my shrimp the best environments to thrive in.
Let’s make sure we get you started on the right path. If it’s your first time keeping shrimp, this guide won’t leave you worrying about anything you might need to know. There’s both creativity and science to be done, so let’s get started.
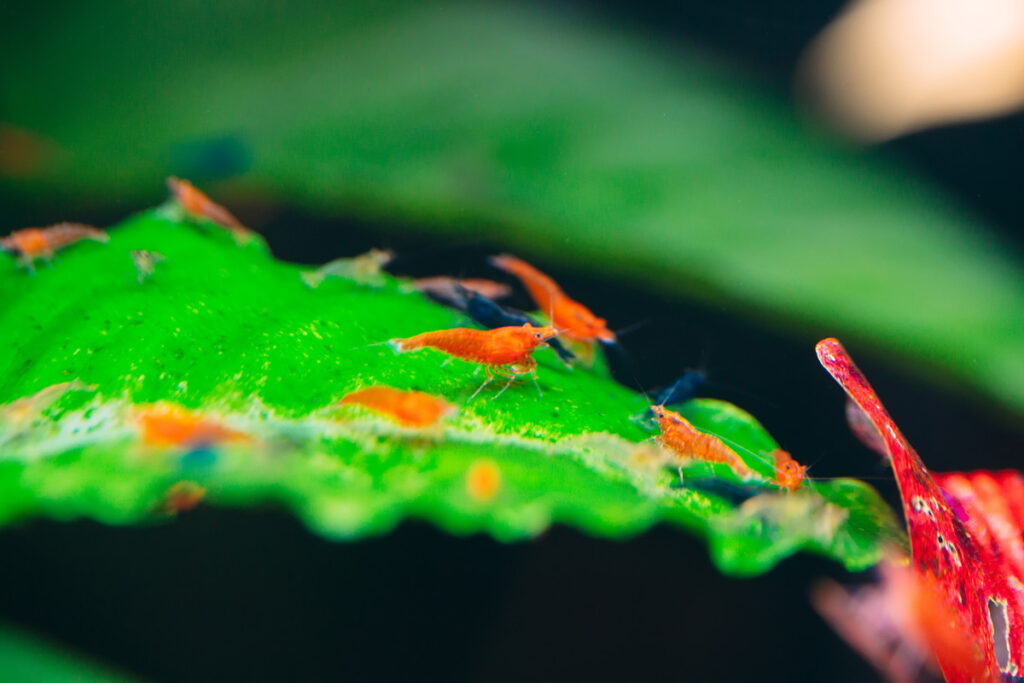
Things you need to set up a shrimp tank
Here’s a list of things you need to set up a shrimp tank:
- Aquarium
- Shrimp safe filtration
- Heating
- Lighting
- Substrate
- Water testing kit
- Plants
- Water conditioner
- Aquarium starting bacteria
- Shrimp food
- Cleaning equipment
- Bucket and Jug
- Air stone and air pump (optional)
- Decor (optional)
- Aquarium backdrop (optional)
- Thermometer (optional)
How To Set Up A Shrimp Tank – 7 Easy Steps
Now you know everything you will need, let’s look at the easy steps to setting up your shrimp tank.
Disclaimer: Before you get too excited, I need to let you know that if you’ve never set up an aquarium or shrimp tank before, getting the ball rolling requires a bunch of patience. The reason is that shrimp have to live in water that’s safe for them to do so.
Without having any other suitable tanks you might have set up to help kick start your new shrimp tank, you will need to go through a process called “cycling”, where you allow essential bacteria to grow inside your tank, in your filters and your water, and create this safe environment that your shrimp can live in. This process can take anywhere from four to eight weeks, so keep this in mind if it’s your first tank.

Step 1 – Decide on a tank size
Visualising your dream shrimp tank is more important than you might expect. Ask yourself; Where is the tank going to go? How much space do I have where I’d like to put it? What kind of shrimp do I want to keep? Here are a couple of tips to help you when imagining your perfect shrimp home:
Shrimp can thrive in nano tanks
Even though it’s a lot harder to maintain, if space is limited, it is possible to keep shrimp in much smaller tanks than most tropical fish. However, I’d always try to go bigger for a beginner if you have the space. This is because small mistakes or issues in your water will have a much bigger impact on your water’s overall parameters or temperature. A much bigger change than in a larger volume of water, which can dilute problems while they’ve gone unnoticed such as dead shrimp in the water or left-over food not being taken out.
Mixing different colours of shrimp
Regardless of what species of shrimp you’re going to get, you need to know about mixing multiple colours of compatible shrimp in your tank. If you put two colours of compatible types of shrimp in your tank and they successfully breed, you can end up with shrimp that is a colour mix of the two. Over time, this just results in brown shrimp so it’s best to figure out what species of shrimp you’d like to keep and check their compatibility with other shrimp species.
If you’re only going for one species of shrimp, such as a red cherry shrimp, you will have the same problem mixing them with other colours of the same kind of shrimp such as a blue dream or yellow cherry shrimp. However, there are many different species of shrimp that can be kept together that won’t breed with each other. You can find a useful chart that will show you the compatibility of different shrimp species here.
Will there be tank mates?
Do you want more than just shrimp? Shrimp can live with all kinds of fish and snails, so if you’re thinking about having them live with other kinds of aquatic life, now’s the time to decide! It’s important you choose tank mates that can live in harmony with shrimp instead of constantly preying on them, but there’s always going to be a possibility that a fish might want to nip at your shrimp.
We’ve got a full guide on the best tank mates for shrimp.

Step 2 – Test your tap water
Before you actually set up your tank, it’s a great idea to do a test on your home tap water to see how compatible it is to use in your tank. There are other options for water if it isn’t compatible, such as buying water from a local aquatic store but tap water is clearly the easiest option to have if it’s safe to use.
I would recommend setting yourself up for success by buying yourself an at-home water testing kit and searching for a local aquatic store to have your water tested at if possible. They will usually charge a small fee or sometimes offer it for free.
You want to be able to check your water at home at least once a week, but also at a moment’s notice in case a shrimp has died unexpectedly. As a beginner, having your water tested at a local aquatics store makes sure you get the tests right while you’re getting started, and also lets you get some more experienced opinions on the results in case there is an issue with one of the parameters.
While there are a couple of different types of test methods available, I recommend liquid-based tests if you’re confident in measuring exact amounts of water and drops. If you’re not, then test strips are also a good place to start.
Before you test your water, you will need to dechlorinate it first. Tap water is treated in order to be safe for us to drink, so conditioning it to remove any unwanted chlorine, chloramine or any other potentially harmful particles like heavy metals is a habit you will get into before doing anything with your water.
Step 3 – Add substrate and decor
Now that you’ve verified that your water is safe to use, or you’ve got another solution sorted like buying water top-ups from a local aquatics, it’s time to place your tank in your desired location and get the basics of the tank in place. If you have a background for your tank, it’s time to put that on the back of your tank first before you place it where you want the tank to stay.
At this stage, you should already know what kind of substrate you want to use be it sand, aquarium soil or gravel. You should also already know what decor and hardscape you want to place in as well. You won’t be adding plants at this stage, but having an idea of what plants you plan on adding will be helpful. You don’t have to know exactly where everything is going to go at this point either, you can just let your creativity shine and add plants later as you feel you want or need.
Here are a couple of tips for you to think about when putting in your substrate and hardscape:
Thickness of substrate layer
If you’re planning on having a feature piece of hardscape in your tank such as a rock or driftwood that takes up a large amount of space, it might be worth trying to layer your substrate so it starts a bit thinner at the front and gets thicker towards the back of the tank. This creates a feeling of depth in your tank and it will also make it easier to see you shrimp that are towards the back of your hardscape.
We’ve got a full guide on the best substrate for cherry shrimp to help you out.
Rocks vs driftwood
When it comes to aquascaping, the decision between using rocks, driftwood or a different decoration really comes down to personal preference and whether you’re going for a certain aesthetic. Within the world of aquascaping there are names for all sorts of different configurations If you’re just getting started, maybe think about whether you’d like a more natural environment, or a more aesthetically pleasing look and go from there.
If you’re going with natural, consider driftwood as your centrepiece with rocky substrate as their natural home is in ponds and streams. If you’re looking to attach plants to your driftwood, you can do this with either super glue gel or cotton string. If you’re using super glue gel, you need to make sure you get the cheapest you can find, because name branded super glue often comes with other chemicals in the gel that will be harmful.

Step 4 – Add your water and plants
If your tap water is safe to use, it’s time to fill a bucket with water to put in the tank. Make sure you’re using a clean bucket, and it doesn’t have any soap or leftover particles from using it previously. Because shrimp like their water between 24-27C (75-80F), if your hot water is just as safe and particle-free, you can use a mix of hot and cold water to make a warmish amount of water that won’t shock your shrimp during water changes.
Before you put your water into your tank, you want to add your water conditioner to make sure it’s safe to put into the tank, dosing it to the amount of water in your bucket and not the amount of water going into your tank.
It is possible to keep shrimp without having any plants but it’s not recommended and will be a lot harder to keep them healthy. Plants have an essential job in your tank of absorbing nitrites and ammonia which are two of the most basic parameters you need to keep an eye on and keep as low as possible in your tank. They create oxygen which is also needed in your water and help to stabilise the PH level of the water. All around, your shrimp will thank you for giving them places to hide and graze.
Before adding plants, use your hardscape or a slow pouring method low to the substrate or water line to add your water to the tank. Try to add water in an area that won’t kick up your substrate and mess things up. Fill up 3/4 of the way, and then you can start adding plants using long tweezers to grab the base where the roots are and inserting it into your substrate just deep enough to cover the roots. Once you have finished inserting plants, feel free to top the tank up until it’s full. Don’t worry if the tank looks cloudy, it will just be kicked up substrate that just needs to settle, and should mostly be gone overnight.
We have a guide on the best plants for shrimp tanks.
Step 5 – Set up your filter and heater
A heater and filter are unskippable when setting up a freshwater shrimp tank. Filters catch particles in your tank water and prevent a buildup of ammonia and nitrates, helping to keep your water clean and a safe environment for aquatic life. Likewise, because shrimp live in other areas of the world, they need a climate that constantly matches where they’re from, and a heater can automatically maintain a constant temperature range throughout the day.
What makes a filter suitable for shrimp is its ability to push water through its actual sponge or sponges without any risk of shrimp and even shrimp babies getting sucked in. That would definitely suck. If you bought an all in one shrimp tank setup that came with a filter and heater, then you don’t need to worry because the filter is designed to be shrimp safe.
If you don’t have an all in one setup, you’ll usually find people using submergible air sponge filters, hang-on-back filters which just need filling up, or submergible motor-powered filters where the filter sponge covers the water entry point which protects the shrimp from entering the filter.
In most cases, your filter will just need putting together, submerging in your tank with a suction cup and powering on. They can sometimes come with attachments to allow air to be pulled into the water flow creating bubbles in the water. If it does, you can choose to use that but normally you will have better control over the flow of your water and air if you use a separate air pump.
Heaters keep the temperature of your shrimp tank in line with what they’re used to in their natural habitat. This will most likely be hotter than the ambient temperature water you could provide in your room. Having one ensures you can keep a stable temperature for your shrimp, and avoid any seasonal or daily drops in temperature that could harm the shrimp and the bacteria that live in the tank. That’s why it’s essential to have a heater in your shrimp tank.
Being safe around water and electric equipment
Don’t plug in your heater or filter until you’re happy with where they’re placed in the tank. Your submergible heater will get extremely hot outside of water, which can harm yourself and the heater itself. Also, it would be wise to wire your equipment in a “drip loop” fashion, where the wire loops upwards at least one point before reaching the plug. This will prevent any water from reaching your plug as it won’t be able to flow down the part of the wire that is looping upwards. Your light should also now be connected and turned on.
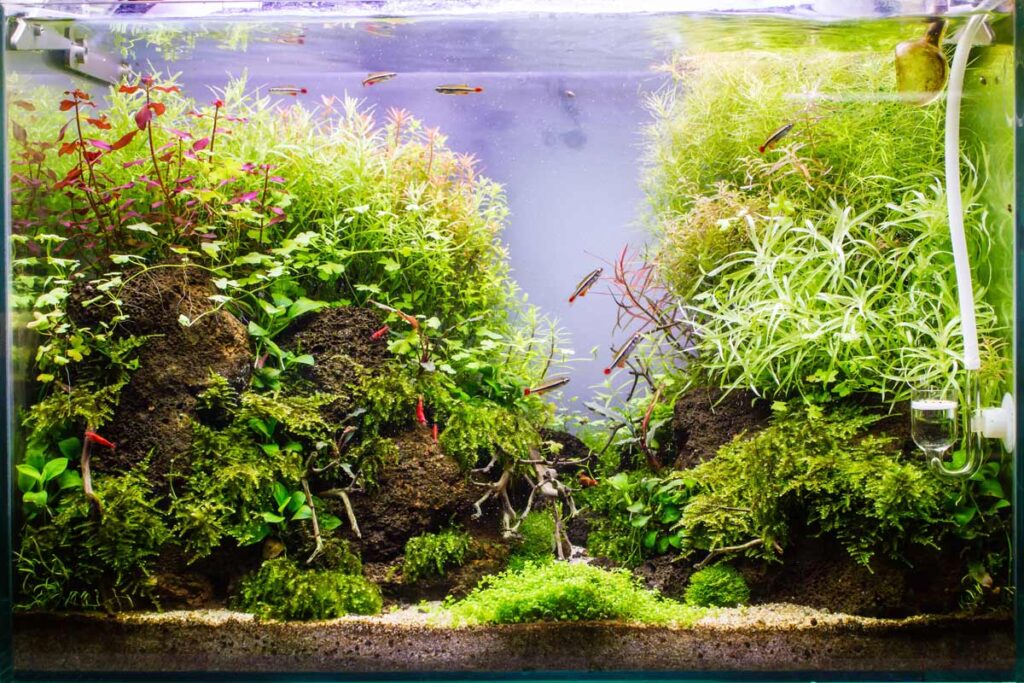
Step 6 – Cycle your tank
Here’s the part that requires patience. Now that your tank is turned on and running with live plants, the tank cycle must be completed and cannot be rushed before you add any shrimp, snails or fish.
Cycling the tank is the process of having beneficial bacteria grow and live in your tank which removes toxic waste made by anything living in it. Completing this nitrogen cycle will mean it is safe for its soon to be inhabitants to live in your tank, as long as you monitor and maintain the tank regularly.
How does the nitrogen cycle work?
The bacteria that grow and break down ammonia will turn them into nitrites, and then another kind of bacteria will grow in order to break down the nitrites and turn them into nitrates. Nitrate levels will rise on their own with time, but luckily any plants you have will love using that as a food source for themselves, and regular water changes will help to keep the toxic levels of nitrate maintained.
This process is why it takes so long to set up a shrimp tank. It is possible to kick start your tank by adding aquarium starting bacterias, but they can’t force your tank to be cycled straight away. You’ll still have to play the waiting game. Another good way to help start the cycle is to add shrimp food into the tank which will also encourage ammonia to start growing faster.
Knowing when your tank has cycled
Testing your water daily is an essential part of this process, and helps you keep track of what stage of the cycle you’re on. Watching your ammonia build and then slowly become nitrites will show you that the first bacteria has started to go to work. Likewise, seeing the nitrites turn into nitrates is another good sign. Your target is zero mg/l for both ammonia and nitrite.
Other parameters for your shrimp should also be tested, such as PH, GH and KH with what we would have recommended as water testing kits, but as well you should look into getting a TDS testing pen, which will check the number of particles in the water. It is a lot of different testing to be done, but knowing how your water acts and reacts to different stages now will equip you with knowledge on how to deal with changes in your water parameters should something go wrong.
After the stage of seeing ammonia being turned into nitrites, it is vital to keep an eye on your nitrite levels as a very common problem known as “new tank syndrome” can occur in your tank if your nitrite levels spike higher than the bacteria can grow to break it down. If you had put shrimp in straight away and tried to complete the nitrogen cycle while having this spike, it would be immediately fatal to them. This is why you need some patience to get your first tank started.
Step 7 – Add your shrimp
If you’ve made it to this step, it means your tank is now fully cycled and you’re probably all out of patience. Great job so far! This far in, you’re ready to add your first couple to a few shrimp, but don’t go overboard just yet. Do not add any shrimp to your tank without acclimating them first. This is one of the most important and unskippable steps, as they need to be slowly introduced to their new environment. Hang in tight, and practice daily water testing to make sure that the added waste being produced by your new shrimp doesn’t send any of your parameters skyrocketing.
After a few days or if you can wait a week, make sure your water is still steady and then you can add a few more. Be sure not to overpopulate your tank though, as you don’t want it to get too crowded. Your shrimp will be very good at growing their colony, so try to stick to adding a set maximum based on your tank size. To be safe, you should add any living addition to your tank in stages, so as to not make too many changes at once. Other than tank maintenance and weekly water changes, you should now be fully set up and best of all, set up in a way that will give you more permanent stress-free results. Parameters may swing while you’re adding shrimp, and if you get sudden spikes a small water change up to 25% should help clear some of your water from these emergency toxic climbs.

Conclusion: Setting Up A Shrimp Tank
Congratulations on setting up your new shrimp tank! Hopefully, you’ve enjoyed the process of creating your dream tank, and now you have a safe environment for your shrimp to live and thrive. You’re now more than capable of maintaining and caring for your shrimp and other friends. Things will pop up over time, but try not to panic. Once you fix a problem once, you’ll always know what to do next time, and maybe have leftover medicines or ways to fix sudden issues with water parameters as they crop up to surprise you.
Although shrimp are very sensitive, they can be easy to care for in the right environment, and by getting things right the first time around, you’ve really laid the groundwork for a successful, happy and fun time keeping shrimp!